Welcome to our detailed guide on creating your very own industrial-style pipe lamp, a fantastic DIY project that combines safety, practicality, and affordability. By taking a hands-on approach to lamp-making, you can enjoy the benefits of customization, adaptability, and cost savings, crafting a unique lighting fixture that perfectly suits your space and style.
In this guide, we’ll explore various material options such as galvanized steel, copper, and black iron pipes, allowing you to select the ideal choice based on your preferences, budget, and desired aesthetics.
We’ll place special emphasis on safety measures throughout the process, including the use of goggles, gloves, and proper wiring techniques, ensuring a secure and risk-free DIY experience.
Ultimately, our goal is to help you create a stunning, functional, and durable industrial-style pipe lamp that expertly marries form and function. With our clear, accessible language and step-by-step guidance, you’ll be well-equipped to embark on this engaging and rewarding project.
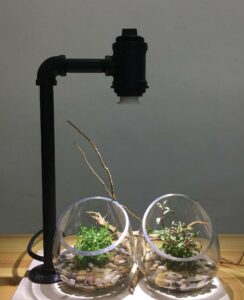
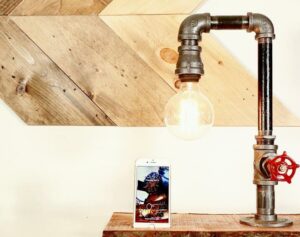
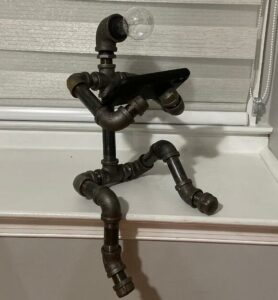
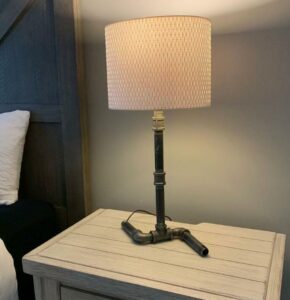
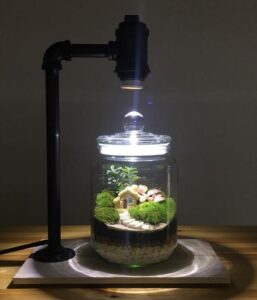
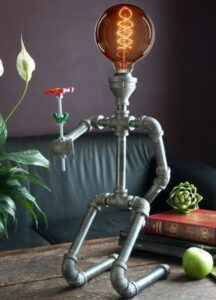
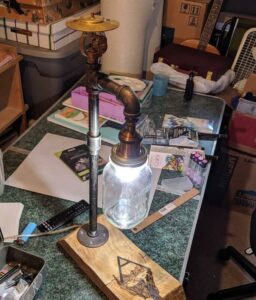
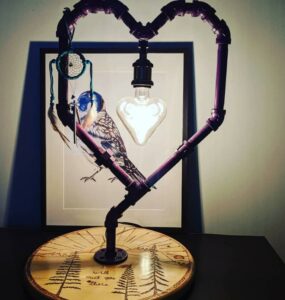
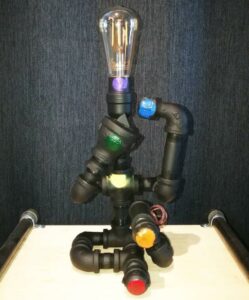
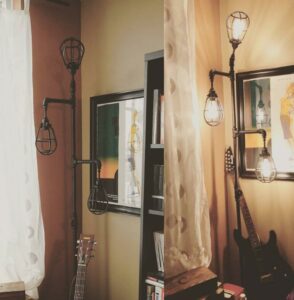
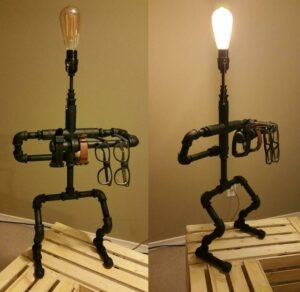
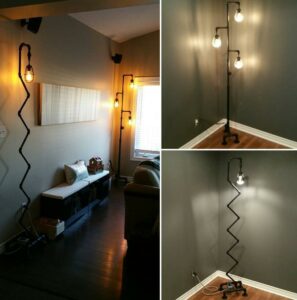
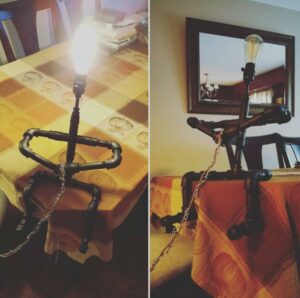
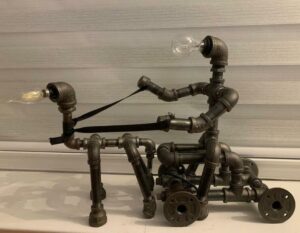
Before our DIY, let’s first get some inspiration!

Now, let’s start our DIY project.
What Supplies Do I Need to Make a DIY Industrial Pipe Lamp?
To make a DIY industrial pipe lamp, you will need the following supplies:
1. Metal pipes: Square or round shape, in various lengths and diameters.
2. Pipe fittings: Elbows, tees, flanges, couplings, etc.
3. Lamp socket: E26 or E27 socket with mounting hardware.
4. Light bulb: Edison-style, LED, or incandescent.
5. Electrical wire: Cord set with plug, or wire by the foot.
6. Switch: In-line foot switch, rotary switch, or dimmer switch.
7. Screws and anchors: To mount the pipe lamp to the wall or ceiling.
8. Tools: Screwdrivers, pliers, wire strippers, pipe cutters, and wrenches.
What Type of Light Bulb is Best For a DIY Industrial Pipe Lamp?
The type of light bulb that is best for a DIY industrial pipe lamp depends on your personal preference and the intended use of the lamp. Some popular options include:
1. Edison-style bulbs: These bulbs have a vintage look and emit a warm, yellowish glow. They pair well with the industrial look of the pipe lamp and can create a cozy atmosphere.
2. LED bulbs: LED bulbs are energy-efficient and long-lasting. They come in a variety of color temperatures and can emit cool or warm light depending on your preference.
3. Incandescent bulbs: Incandescent bulbs have a warm, natural light and come in a variety of shapes and sizes. However, they are not as energy-efficient as LEDs and have a shorter lifespan.
Do I Need Any Special Tools to Create a DIY Industrial Pipe Lamp?
Yes, creating a DIY industrial pipe lamp will require some special tools to work with the metal pipes and fittings. Some essential tools you will need include:
1. Pipe cutter or hacksaw: to cut the metal pipes to the desired length
2. Adjustable wrench or pliers: to tighten the fittings onto the pipes
3. Screwdriver: to attach the electrical components to the lamp
4. Wire stripper: to expose the wire for connection
5. Electrical tape: to secure and insulate wire connections
6. Drill and drill bits: to create holes in the wall or ceiling for mounting the lamp
7. Screws and anchors: to attach the lamp to the wall or ceiling
How Do I Wire an Industrial Pipe Lamp?
Wiring an industrial pipe lamp requires some basic electrical knowledge and skills. Here are the steps to wire a lamp socket:
1. Cut the electrical wire to the desired length, leaving an extra inch or two for stripping.
2. Strip the last 1/2-inch of insulation from the wires.
3. Thread the wire through the lamp’s bottom section and attach the lamp socket’s screw terminals to the wire. Make sure to connect the “hot” wire (usually black) to the brass-colored screw and the “neutral” wire (usually white) to the silver-colored screw terminal. If there is a green wire, connect it to the green screw terminal.
4. Test the wires for proper connection by gently tugging on them.
5. Attach the lamp socket’s mounting bracket to the inside of the lamp’s top section, making sure it’s secure.
6. Screw in the light bulb and turn on the lamp to test it.
Note: If you’re not confident in your electrical skills, it’s always a good idea to consult with a professional or seek out resources on wiring lamps safely.
Steps to DIY Industrial Lamp for Home Use
Here are the steps to create a DIY industrial lamp for home use:
1. Gather your supplies: You’ll need metal pipes, pipe fittings, a lamp socket, a light bulb, electrical wire, a switch, screws and anchors, and tools.
2. Plan your project: Sketch out your design, measure the lengths of the pipes you’ll need, and select the fittings and components that will work best for your lamp.
3. Cut your pipes: Use a pipe cutter or hacksaw to cut your metal pipes to the desired lengths.
4. Attach fittings: Use adjustable wrenches or pliers to tighten the fittings onto the pipes in the desired arrangement.
5. Wire your lamp socket: Follow the instructions in the previous answer to wire your lamp socket to the electrical wire.
6. Add a switch: Install a switch into the electrical wire near the lamp socket. In-line foot switches, rotary switches, and dimmer switches are all good options.
7. Mount your lamp: Use screws and anchors to mount your completed lamp to the wall or ceiling.
8. Test your lamp: Screw in the light bulb, turn on the lamp, and enjoy your DIY industrial pipe lamp!
Note: This is only a general outline, and you may need to modify the steps based on your specific project.
FAQs:
Can I make a DIY industrial pipe lamp without any prior experience in DIY projects?
It is possible to make a DIY industrial pipe lamp without any prior experience in DIY projects, but it may be more challenging. You will need to familiarize yourself with the tools and materials involved and may need to do some research on electrical wiring and safety. It’s important to follow instructions carefully and take appropriate safety precautions when working with metal pipes and electrical components.
Can I customize the design of a DIY industrial pipe lamp?
Yes, one of the advantages of creating a DIY industrial pipe lamp is that you have the freedom to customize the design based on your personal style and preferences. You can choose the size and shape of the pipes, select different types of fittings, and experiment with various color schemes and finishes. You can also add additional features, such as shelves, hooks, or decorative elements. The possibilities are endless, and you can create a lamp that is truly unique and tailored to your specific needs and tastes.
Can I add a lampshade to a DIY industrial pipe lamp?
Yes, you can add a lampshade to a DIY industrial pipe lamp, but you need to make sure it’s properly supported and installed.
Most lampshades require a “harp” that attaches to the lamp socket and holds the shade in place. You may need to use an adapter or bracket to secure the harp to your pipe lamp, depending on the design.
Alternatively, you could attach the lampshade directly to the pipe using clamps or other hardware, but this would require some additional modifications to your lamp’s structure. As always, when working with electrical fixtures, make sure to follow proper safety precautions and consult with a professional if you’re not confident in your abilities.
How do I keep my DIY industrial pipe lamp from tipping over?
1. Use a heavy base: The base of your lamp should be heavy enough to support the weight of the structure and the lampshade. You can use a weighted object like a concrete block or a heavy metal plate as the base, or add a heavy object inside the base to weigh it down.
2. Secure the lamp to a surface: If you’re attaching your lamp to a table or shelf, make sure it’s securely anchored using screws or other hardware. You can also use clamps or brackets to secure it in place.
3. Use appropriate fittings: Make sure the pipe fittings you’re using are designed to support the weight and structure of your lamp. Use durable materials and fittings that are rated for your lamp design.
4. Keep it balanced: When assembling your lamp, make sure the weight and distribution of the pipes and fittings are balanced to prevent any tipping or wobbling. Test your lamp frequently to ensure that it’s stable and adjust the base or fittings as needed.